Thursday, September 27, 2012

Basement... The beginning

Warning this post... shows a lot of Inspiration photos.
You have been warned.

So usually I just break from blogging while working a project and show you the ending photo. I hardly ever include a beginning photo... because... well I am easily distracted and never think of it... and if I do think of it... well.. something else comes up.

So I thought with this big project... why not just bring you along for the old boring play by play on how this is all going to go down.

So here we are on day 1.
Our basement... is a disaster.

So here we are.... currently... the long scary... ugly stairway


And currently my inspiration for the stair way...


Source: via Fawn on Pinterest


When you come down the stairs... we have this area to the right. That currently is holding a bunch of crap. Well You see that header there... we are planning on just closing it off there and using this as a storage area....


And my plans for concealing this junk....


Ok then we have a long area... and at the end of that long area... we have some windows... way back there in the shadows.. So I am planning on adding a serving area down by the windows... and I haven't decided what to do with this space yet... but a few things I am liking... are listed below the current photo (oh and ignore the table and paint... currently I use this ugly basement to paint in)

Inspiration... begins... now
Serving area


Then this area... we plan on turning into a media area...


Inspiration for that..

Source: houzz.com via Fawn on Pinterest

Or...

Source: houzz.com via Teresa on Pinterest
And then on the other side of those 2x4s... will be the bathroom


Inspiration for that...


And then hopefully adding in some sort of play area for Maddux under the stairs...
The inspiration for that is kind of girly...  but something fun...
Source: mossymossy.com via Fawn on Pinterest


So the main ideas for our basement....

I want a movie area... projection TV... a large sectional - probably something from Ikea... something low to the ground :)

then a serving area...
so we can host birthday parties and what not in the basement.

besides that I'm not too sure what we will do.
i want to be able to host some get togethers.. so i don't want to fill the space too much. so we will have to see what I come up with...

but... first things first... ceiling and walls...
To Be Continued... you are on the edge of your seat... I can feel it ;)

Master Closet System

I am finally sharing the Master Closet System we built back in January! :)

Our closet in our master bedroom was pretty generic. One wire rack... which usually resulted in a mess. We needed more space to hang our clothes...and some areas for bins for folded clothes. I hope to someday add some drawers and maybe a more complex closet system. But for the first round... it is definitely an improvement.

We took out the wire rack and created four separate sections for hanging clothes with some shelving units in the middle.

I do not have a picture of ours. But all of the closets in our house look pretty much the same.  So this was very similar to what we started with. One wire rack that wrapped around and had one shelf on top. It didn't actually help very much at all...


I hung a mirror in the closet so I can try on clothes inside the closet while figuring out what to wear... because if I take them out of the closet... they usually end up thrown about the bathroom floor.

Also added in four shelves for storage and a belt/tie holder to help organize those...

On the other side. I added a small wire shelf to hold dresses and hats. a small wire basket to hold scarves. my vintage framed necklace holder and a belt holder...

a few small changes helps organize what was once a very chaotic closet.

This is not a very glamorous makeover... and really to be honest. Later down the road... Someday. Like WAAAAAYYYY down the road. I have hopes of gutting our bathroom and closet and completely changing the layout... I also have dreams of winning the lottery... so for now... this helps us stay a little bit more sane.... It was a quick and cheap weekend project.

We built two bases of MDF for the hanging of clothes. Bought dowel rods and cut to fit in this space. Then bolted those to the wall. Then we created shelving between the two bases for baskets of clothes.
Then we just filled in the rest of the space here an there with a few of our needs.

I wouldn't say this project is "complete" but its better than where we started...

A few people asked about it... so I thought i would share some in progress photos...


So there you go...

We did this back in January... and we kind of said "Good Enough" and have moved on.

It does help us stay more organized...and we have so much more space this way. The one wire rack. was terrible. Absolutely terrible!

I have seen a few glamorous closet makeovers ... Some day... but for now... Eh. Good enough :) 

The Shabby Nest

Monday, September 24, 2012

Chalkboard Entry

When we moved in last October... One of the first things we did was paint our entry way with chalkboard paint. I love this wall. Maddux goes through phases of playing with it...on and off. But weekends that my nieces are here... it gets a lot of use.
This past weekend the girls were over... so the aftermath... looked like this


We keep the chalk in that little bucket there... so Maddy can reach it also.

Once in a while... I get creative and put something fun up there... but I thought I would share a "real" in use photo of the Chalkboard wall :)

The Shabby Nest

Monday, September 17, 2012

Star Wars Bedroom Updates

So a while back... I showed you my son's Star Wars inspired bedroom... which you can see HERE

And mainly... I want to concentrate on this area

The cute tree book sling..
which was a tad out of place in the bedroom

So I finally found some Star Wars fabric and updated this to match the rest of the room.


I also took a gun rack we found at Goodwill and used that to hold some light sabers.


And added a few new pieces of artwork....


And a Lego table :)


So there you have a few small Star Wars updates. :)

Tuesday, September 11, 2012

ChuggaChugga Train Board!!!

Maddux has a train set... that he loves. But it takes forever to set up and once it is set up... he is so bored with waiting that he plays with it for like. ... 5 minutes and then is over it.

So last week I was inspired by YoungHouseLove
they created a train board for their daughter... where they screwed the tracks into a piece of plywood... painted a little scene.... and they can just slide it out from under their couch.

Well our couch is too low for that idea. but we do have his play table that this could work for.

So I bought a 9 dollar piece of plywood... and set up the tracks. painted a VERY generic scenery
and screwed in those train pieces... and there we go. It is ready for whenever he wants.

Easy Peasy... why did I never think of this???

Thank you Younghouselove :)

You can find the tutorial over on their website ... if you need one.

Here is us trying to set up the tracks...


 here is the after :)


here's me checking to make sure the train tracks don't fall off..

please ignore my weirdness...


And here is where we store it....


Simple project. Maddux loves :) 

Don't mind the crazy lighting... I try my hardest to take photos during the day... sometimes.. that doesn't work out :)

Monday, September 10, 2012

Kids Bathroom Phase 1 ...

When we bought our house... it was a good time to be in the market for a house... and to be honest.. we stole our house. We got an amazing deal. But even though normally this house would be out of our reach.... I still wasn't crazy about a lot of the stuff going on.
Don't get me wrong. I love my house. I really do. When we bought it... I had to find a place that ... if I had to live there forever. I would be  happy.
And this house... overall. big picture wise = Very Happy

BUT

The details in this house made me... not so happy.
Ceramic Tile was put down... pretty much anywhere they could justify. and very plain... boring. Ceramic tile... that I just do not want.
Then crazy marble bathroom vanity tops... that I cannot stand. seriously. I cant stand the bathroom counter tops.
I walk into every bathroom. and there it is black and white marbled counter tops. its gross.
and honey oak. Now some people love honey oak. Not me. again. a detail that can be changed...
but one that I continually obsess over.
Anther detail... that drives me nuts... the traditional bathroom vanity lights... and boob lights. every. where. in. the. house.

But sadly I cannot fix all of these things at once. I wish I could. I have tried clicking my heels together... and wishing as hard as I can for a bottomless Lowe's gift card. but it never happens. So ... I guess I will have to continue with my changes piece by piece.

Currently. the expensive project in the house is the kitchen floor. Putting in laminate to match the living room and the hallway has drained our pockets for a little bit. So onto cheap changes... and lots and lots of googling....

So above you can tell.. The bathrooms drive me nuts. So the bathroom right off of Maddux's room is a giant eye sore for me every time I walk in.

Its generic. I have generic vanity lights staring at me. Honey oak cabinets. Honey oak trim. Builder grade vanity mirror. Bland ceramic tile. off white walls. and bi-fold doors that give me nightmares.

To put it nicely... .there isn't a whole lot I am happy about when I walk in. dual sinks. I'm excited there's room for that. There you go. My positive note on that bathroom ;)

 So its not a secret. I am a fan of Ana-White. The girl wears heels while building. I mean. if you know me... this is something that speaks to my soul.

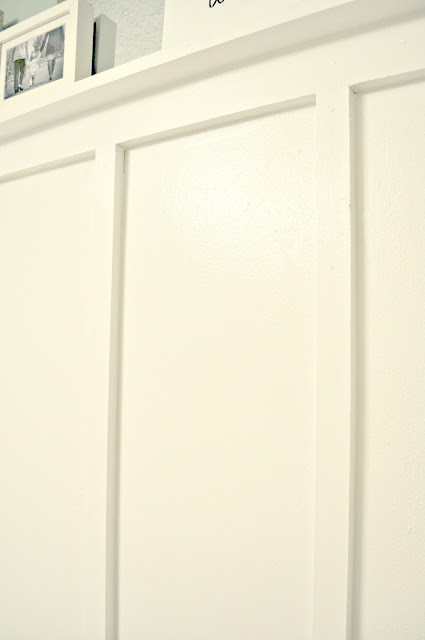
so looking at her website. I came across her 20 dollar board and batten project she did for her bathroom .and I started thinking... Hmmm Maybe I can just put this on the two walls... that create the giant eye sore. 20 bucks... was in my budget... I already had white paint...

So off to Lowe's I went. grabbed 8 1x2s 3 1x3s... walked by the "oops" paint section .found a green color... that was marked down to 3 bucks... and this was phase one of the bathroom makeover.....

Now if you want instructions... Check out Ana-whites instructions. Easy... i swear... this is such an easy project...and you will love the results. instant character built right in :)

So phase 1 makeover...

started.. .


Well its not normally quite that messy but i took everything down to get ready to do the wall.

Maddux had his toy tools and was ready to help! :)

So here is our1x2a liquid nailed up to the wall....


Pretty huh? It gets better... we then got to this point...


And by the end of the night...


Then I created some quick artwork on my silhouette... took some blank canvases i had stashed away for just in case projects....

and here is the bathroom today


Not bad for a 23 dollar makeover ... Right?

So phase 1 of ugly bathroom complete. And it makes the room look SO much better. Next up. I want to frame out that builder mirro and paint that vanity. I am thinking dark brown. maybe staining it. we will see. But for now... I dont cringe walking into here...


Design by Small Bird Studios | All Rights Reserved