Showing posts with label DIY. Show all posts

Wednesday, June 3, 2015

We decided to buy a pool...

We decided to buy a pool this past year. To be completely honest... I have never wanted to own a pool and I am not sure where I am on it... still. But Maddux and his dad were begging for one. So I decided to give in and see how it goes... Under the agreement that taking care of the pool is 100% my husbands responsibility  And we got Maddux in swimming lessons so he knows how to swim. Because... pools and kids... FREAK ME OUT!

Our yard is crazy messed up. its a giant hill filled with weeds and craziness. so the idea of not having to worry about the yard is great. However... trying to tie a deck in with our current deck and patio is going to be.... interesting. But I think we finally came up with a plan... In my head it looks good. We will see if that comes across in real life or not.

They delivered the pool a few weeks ago and set up a time for the dig. So after the guys left...
Day 1 of pool installation left us looking at this...


We are going to attempt to design a deck and figure it all out with some help from some family and friends. I like that they dug into our yard so the deck will be relatively low, so I feel like it will fit in a bit more with the stone patio. We will see how it all goes over the next month.

And because I like lists... Our to do list is as follows

- Level out the extra dirt - use it to level out the side yard
- Have electrician put in electric line
- Have gas line installed
- Get a heater for the pool
- Build retaining wall around the pool so the yard does not cave in and ruin the pool
- Design and build a deck around the pool
- Build flower boxes between patio and deck
- Plant something big at end of patio to block site  of the pool
- Stain deck
- Add furniture and Accessories (the fun part!)
- Enjoy pool

It is quite the to do list... and because we are doing so much of it ourselves it will take some time.
This week we have someone coming out to move the dirt on the side of the house and we went out and bought all the materials for the deck and retaining wall.

We are hoping to get a good head start on the deck this week. And hopefully the week after that we can get the electric and gas going... and finally start enjoying the pool!
Fingers crossed for us. A lot of things have to come together to get it finished within the next few weeks!

Anyone love building decks? Anyone feel like just volunteering time to come over?

No??? Figured as much... Guess we need to get started...


Monday, March 23, 2015

Basement Update - Theater Room... Progress

So this room started out looking like...


Lovely :)

And then... a little better


Jerry has always wanted his own movie room.
But not anything with movie theater seating... just somewhere we could hang out as a family... and veg out and watch movies.

So this past Christmas I got him a movie projector and screen... and it all began :)

We have been working on the basement on and off for the past few years... just an extra area that wasn't a necessity since the rest of the house needed so much work... but I am happy to say I love having this movie room down there. We have a lot of fun on family movie nights... eating popcorn and just hanging out watching movies... :)

This room isn't close to being done... however, it has made A LOT of progress over the past few months. It's still pretty plain. But it's functional. Jerry has a few things he wants to put down in here... and I promised I would let him do what he wants... (I'm a little worried)

Here is where the room is today..


To Do List

  • Put up door to storage area
  • Let Jerry decorate... try very hard to not wince and roll my eyes when he tries to convince me we need a cardboard cut out of... Rambo.
  • caulk and paint trim
  • cut in and fix the few painting mishaps down there.... 
  • buy rug for kiddos to play on
  • build shelf for Jerry's toys Memorabilia
  • coffee table 
  • build a long table along the backside of the couch with bar stools for kids to snack and watch movies 
  • build low media center for blue ray player that is currently just sitting on the floor :) 
So as you can see... The room still has quite a bit of changes to go through... and I am hoping we can get a few knocked off our to do list in the next few months. However, Hudson's arrival date is sneaking up on us... and realistically I am not sure what will get done and what will be pushed back.
But at least for now the room is functional... and we are loving spending weekends down there watching movies and eating popcorn! 


Monday, September 8, 2014

Simple Fall Centerpiece.

I love decorating the house for fall. It's something about the coziness that comes along with it.

Stained dark wood
Pumpkins
Candles
leaves...

Something so simple... that only takes a few minutes to throw together... makes such a statement :)


This box was so easily created with a bunch of scrap 1x4's.
Mine is 6 foot long. I mix Dark walnut and grey stain together to come up with the finish.
I also bang up the wood a bit before staining these, by hitting it with a hammer.. or running nails along it... something to give it that worn in look.
Pumpkins were purchased at the dollar store.
Battery candles came from TJ Max.
And the garland of leaves... came from my basement. I thin originally I might have grabbed it at Michael's.

Not bad for the grand total being under 25 dollars (and the candles were 15 of that)
Luckily... something like this is so easy to swap out for Christmas.

What is your favorite holiday to decorate for?


Wednesday, August 6, 2014

Little Man. Big Desk

We finally started Maddux's room. Key word = Finally. We have been planning to start it all summer. Now it's August... and we finally got the ball rolling.

We decided to redo his room in a way that suits him. Rather than keep the Star Wars theme, we wanted to fill the room with all things that are him. So this means... Star Wars, Super heroes, Legos, Make Believe, and ART. He loves making artwork, and he loves showing it off.

So we decided to give him an art station in order to just do that.

The desk was originally our sofa table, but we decided we needed more storage down there to hide Madddux's toys that get thrown about, so we moved this upstairs and it worked perfectly. It gives him a lot of room to sprawl out lots of paper (which he loves!)
and a new sofa table project for the living room (which I love!)

 We put some plywood up on the wall so that the pins wouldn't go through to the wall, then used spray adhesive to attach the cork board to the plywood. Then took some molding and framed it out to create a giant cork board. Since.Since we cut the cork board there was a seam down the middle that we weren't very excited about so we took a 1x3 and covered that up. Then we took a small piece of string and hung some Instagram photos across the top! And now he has another place to show off his creativity!


First corner of the new big boy bedroom... Complete!

Sunday, June 22, 2014

And let there be ... more light!


Well I have always loved string lights across an outdoor space. It adds such... ambiance.
I came across a few of these on pinterest where people added in some 2x2s to their deck so they could string lights across and decided this would be a very cheap and easy update to our deck. 

So we stained some 2x2s the same color as our deck and then nailed them in randomly across the deck. 

Then we added hooks so we could string the lights across the top of the deck. and voila.

The patio lights came from Target. We bought 4 strands at 10 bucks a pop! :) So this entire project cost us under 50 bucks!

its perfect. 


Oh you might have noticed the rug changed.
Yeah... that rug they claimed was an outdoor rug... the pretty floral one. It was not. it rained and i had goops of paint all over my deck. Lovely.
Tip: when in doubt. just assume that it does not go outside :)

But I did luck out and find this Threshold rug on clearance at Target! :) 

Saturday, May 31, 2014

Deck... after week 1


So last year we changed our deck around a bit. We put in stairs that kind of wrap around the deck so that they would land on our patio as opposed to just a random spot in our yard...

But then you have to let the wood sit for a year...


But finally this summer we are able to stain it.
We are fighting rain and spring thunderstorms so we got quite a bit of it done the first week and this week we are planning on finishing up the one side and fixing a few spots here and there... and also doing the underside of the deck.
So hopefully within this next week I can do a full reveal. But looks like we will have another week of rain ahead of us... so hopefully soon!

It is amazing what a difference stain makes. Truly.
This deck looks 1000 times better. and I am shocked at the difference.

You can see the stain color in this photo. We also grabbed an outdoor rug that brings a ton of color to this space!

This is a window box I made last year. I am hoping to attach it to the top of the deck... somewhere not sure where yet.


This is a pretty accurate color of the stain we used. Hawthorne - Sherwin Williams. Don't mind that sad dirt area.. we are laying seed as I type. and don't mind the random wet spots... Nala got in the mud... so i had to wipe down the stairs before taking a photo.


We still have a long ways to go.
Finishing the stain
Adding in deck lighting
Adding in some cushion storage up on the deck
Buying more throw pillows
Switching out the sad little light next to the french doors
and maybe picking up some seating for the other corner of the deck

But this is definitely a step in the right direction and we are excited to move forward on this project so we can get as much use out of this area as possible in the upcoming months!

Friday, April 25, 2014

Playroom Final Reveal

We finished the playroom just in time for the home tour....

We might make a few tweaks here and there but for the most part... this room is D.O.N.E.


Monday, April 21, 2014

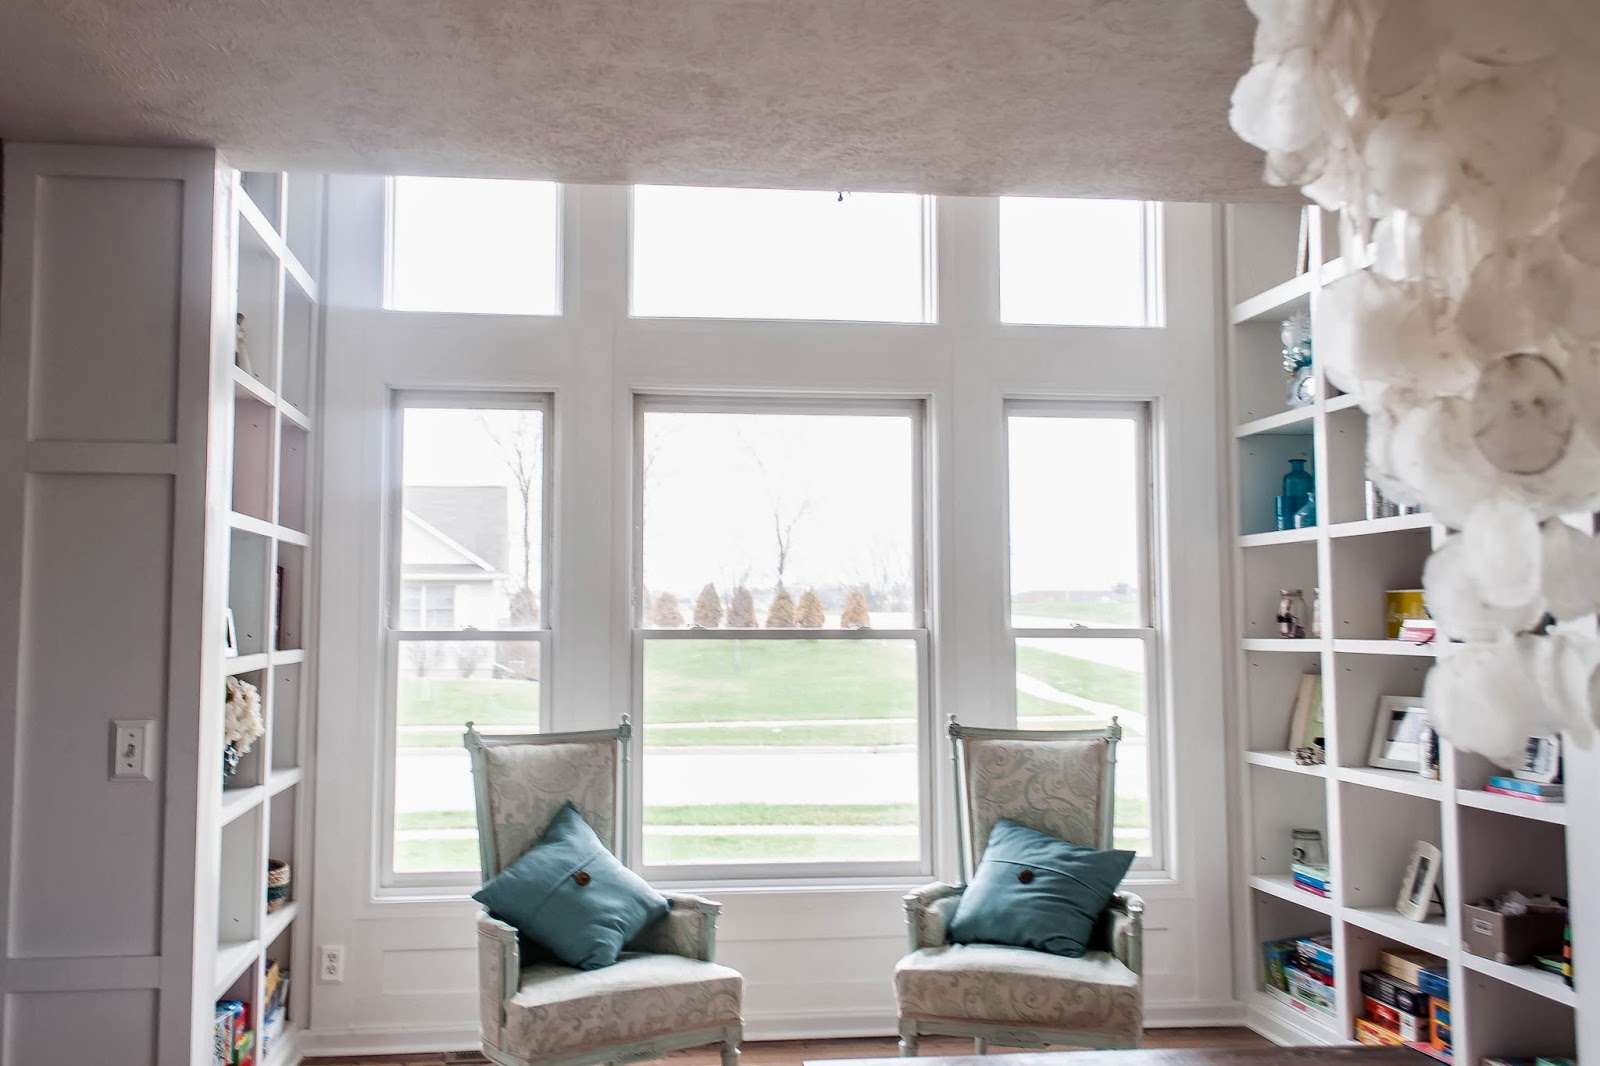
Library Update

Along with final reveals... I realized I have never updated any library photos.

I am still wanting to trade out these chairs for a chaise or two... but here is the library in its current state... with stuff on the shelves and furniture and all...

The last update I gave it looked like this. Complete... but very empty


And now... here we are.... with some chairs there (those are temporary) and some things on the shelves. I will admit... I still have a few empty shelves... I am still working on getting enough stuff to fill all of these!

But here it is now... and looks much more lived in :)


Its still a work in progress. I am hoping to trade out those chairs for a chaise or two... and get a rug in there. and yes... those are still my Christmas snow globes. I just left them there ... and keep meaning to pack them up. If I keep going at this rate... it will be Christmas again before I know it...

But at least the room is no longer empty...  :)

 
Design by Small Bird Studios | All Rights Reserved